Image: clipartmag.com
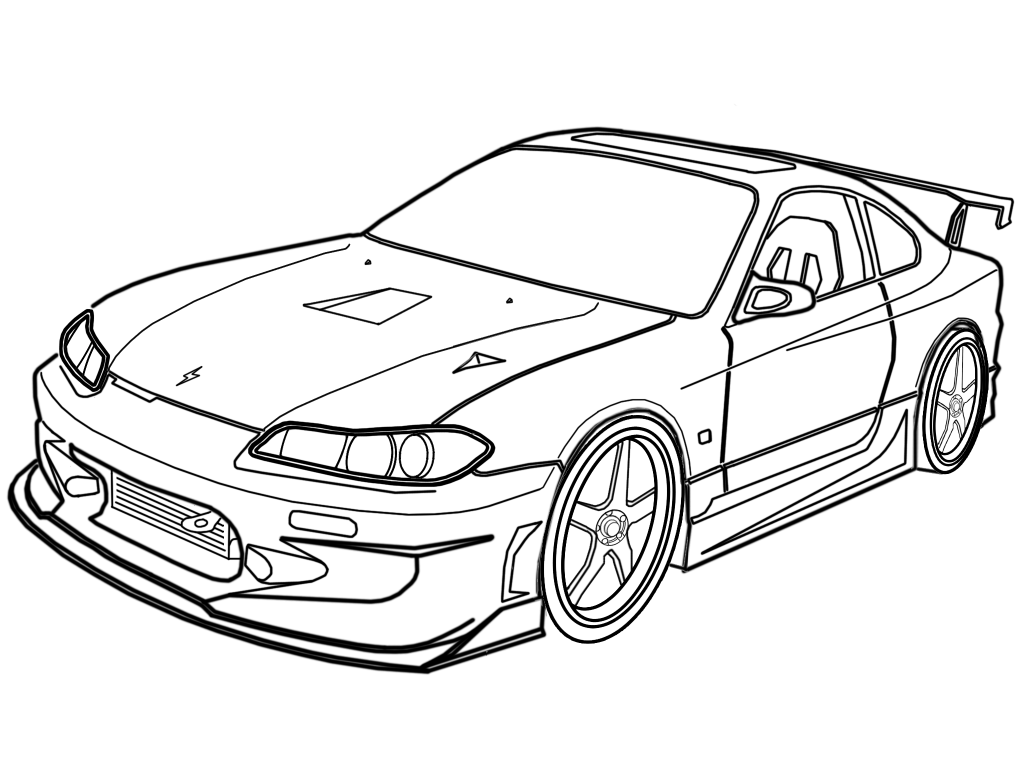
Introduction
JDMs, or Japanese Domestic Market cars, captivate enthusiasts worldwide with their distinct styling, high-performance engines, and tuner-friendly nature. If you’re a budding artist with a passion for JDM culture, mastering the art of drawing these iconic vehicles is a rewarding endeavor. This comprehensive guide will walk you through a step-by-step process to create stunning JDM car sketches.
Step 1: Gather Materials
Gather your basic drawing supplies, including pencils, erasers, a ruler or straight edge, and a sketchbook. For best results, consider using a mechanical pencil with different lead weights for varying line thicknesses.
Step 2: Sketch the Basic Outline
- Start by lightly drawing a rectangle for the car’s body, outlining its general shape and proportions.
- Divide the rectangle into two equal halves horizontally for the hood and cabin.
- Sketch the wheelbase by drawing two parallel lines extending from the bottom of the body outline towards the corners.
- Roughly sketch the shape of the headlights, grille, and mirrors.
Step 3: Add Body Details
- Refine the shape of the hood, adding any scoops or vents.
- Draw the contours of the doors and fenders, giving the car its distinctive lines and curves.
- Sketch the contours of the bumpers, air dams, and side skirts.
- Add details to the mirrors, such as stalks and housings.
Step 4: Draw the Wheels
- For a realistic look, use a compass or template to draw perfect circles for the wheels.
- Position the wheels within the wheelbase, accounting for the correct size and offset.
- Draw the spokes and rims according to the desired wheel design.
- Add tires by sketching ovals inside the wheels and depicting their treads and bulging.
Step 5: Add the Roof and Windows
- Sketch the roofline, following the shape of the A-pillars and C-pillars.
- Draw the windows in their proper proportions, outlining their frames and mullions.
- Shade windows to depict glass surfaces and reflections.
Step 6: Sketch the Headlights and Taillights
- Draw the shape of the headlights, considering their lenses, reflectors, and bezels.
- Add details such as HID projectors, LED units, or angel eyes.
- Similarly, sketch the taillights, outlining their lenses, bezels, and bulbs.
- Consider adding detailing inside the lights for a more realistic look.
Step 7: Add Body Finishes
- Draw door handles, fuel caps, and other external details to complete the car’s body.
- Apply shading or coloring to depict different body panels, graphics, or paint schemes.
- Add reflections and highlights to enhance the car’s metallic surfaces.
Step 8: Ink and Color (Optional)
- Once you’re satisfied with the sketch, use a pen or ink to trace the finalized lines.
- You can choose to color the car using markers, colored pencils, or digital art tools.
- Apply shading and highlights to give the car depth and realism.
- Add details such as logos, stickers, or aerodynamic modifications.
Conclusion
Follow these steps attentively, and you’ll be drawing JDM cars with ease and precision. Remember, practice makes perfect; the more you draw, the more confident and skilled you’ll become. Explore different JDM models, study their unique features, and immerse yourself in the car culture that surrounds them. With patience and dedication, you’ll be creating impressive JDM car drawings that showcase your artistic flair and passion for automotive art.

Image: paintingvalley.com
How To Draw A Jdm Car
